Latest Article Welcome

How To Make Post Title And Title Sidebar In The Middle


"Decorate your blog with tutorials provided. Please click on a category tutorials on your right side to see more tutorials. Most widgets tutorial are compatible with the basic template that has been provided by blogger.com. Some widgets, maybe not for a specific templates that are provided by other personal bloggers. But you can try it first. If it did not work, please remove this widget from your blog. Good luck."

How To Make Post Title And Title Sidebar In The Middle


Eliminate the "Subscribe to: Post Comments (Atom)" on the blog


"Decorate your blog with tutorials provided. Please click on a category tutorials on your right side to see more tutorials. Most widgets tutorial are compatible with the basic template that has been provided by blogger.com. Some widgets, maybe not for a specific templates that are provided by other personal bloggers. But you can try it first. If it did not work, please remove this widget from your blog. Good luck."

Eliminate the "Subscribe to: Post Comments (Atom)" on the blog


"Subscribe to: Post Comments (Atom)" located at the bottom of the post. If you feel the words that look like shrubs, follow the tutorial below for how to lose it ..

Click Link And Automatically Opens In New Tab


"Decorate your blog with tutorials provided. Please click on a category tutorials on your right side to see more tutorials. Most widgets tutorial are compatible with the basic template that has been provided by blogger.com. Some widgets, maybe not for a specific templates that are provided by other personal bloggers. But you can try it first. If it did not work, please remove this widget from your blog. Good luck."

Click Link And Automatically Opens In New Tab


To trick this time, any link is clicked in your blog, it will automatically open in new tab, without adding code to every link target blank.

Here's how:

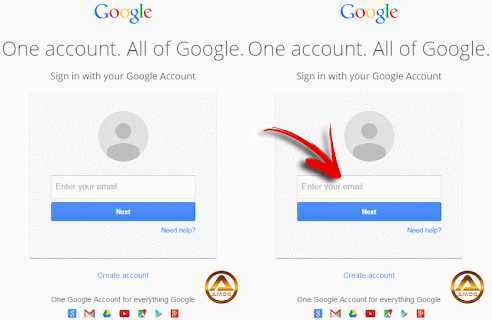
1) Sign in blogger account

2) Dashboard> Design> Edit HTML> Tick the box "Expand Widget Templates"

3) By using ctrl + F (press simultaneously on the keyboard), find the code


<head>

4) Then copy and paste the code below POST / UNDER code <head> are you looking for today:

  <base target='_blank'/>

Examples:

   <head>
  <base target='_blank'/>

5) Click save template.

 Please read more others tutorial about blogger blog and widgets.

Thank you for read...happy blogging......

How To Make Alert Message On Blog


"Decorate your blog with tutorials provided. Please click on a category tutorials on your right side to see more tutorials. Most widgets tutorial are compatible with the basic template that has been provided by blogger.com. Some widgets, maybe not for a specific templates that are provided by other personal bloggers. But you can try it first. If it did not work, please remove this widget from your blog. Good luck."

How To Make Alert Message On Blog


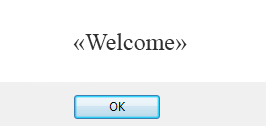
This alert message will appear at the beginning of the blog is open. The trick? follow the tutorial below:

Welcome Exposure Image In Blog


"Decorate your blog with tutorials provided. Please click on a category tutorials on your right side to see more tutorials. Most widgets tutorial are compatible with the basic template that has been provided by blogger.com. Some widgets, maybe not for a specific templates that are provided by other personal bloggers. But you can try it first. If it did not work, please remove this widget from your blog. Good luck."

Welcome Exposure Image In Blog


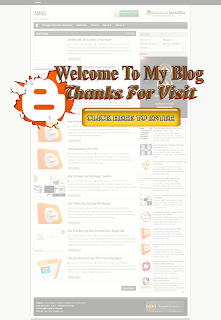
The welcome screen image will appear at the beginning, before going into your blog. After the welcome click on the image, the blog will appear with the effect "fade in" interesting. Like a wide open door before entering the house. Follow the tutorial below.

Add More the "add a gadget" at Top Header


"Decorate your blog with tutorials provided. Please click on a category tutorials on your right side to see more tutorials. Most widgets tutorial are compatible with the basic template that has been provided by blogger.com. Some widgets, maybe not for a specific templates that are provided by other personal bloggers. But you can try it first. If it did not work, please remove this widget from your blog. Good luck."


Add More the "add a gadget" at Top Header

Tilt effect when the cursor touches blockquote


"Decorate your blog with tutorials provided. Please click on a category tutorials on your right side to see more tutorials. Most widgets tutorial are compatible with the basic template that has been provided by blogger.com. Some widgets, maybe not for a specific templates that are provided by other personal bloggers. But you can try it first. If it did not work, please remove this widget from your blog. Good luck."

Shadow box effect when the cursor touches blockquote


"Decorate your blog with tutorials provided. Please click on a category tutorials on your right side to see more tutorials. Most widgets tutorial are compatible with the basic template that has been provided by blogger.com. Some widgets, maybe not for a specific templates that are provided by other personal bloggers. But you can try it first. If it did not work, please remove this widget from your blog. Good luck."

How To Place Blockquote Box In Post

Preview:

For those who do not know what it Blockquote. This tutorial will show you how to put a box on your blog quotes blockquote. What is "Blockquote"? "Blockquote" is used to denote passages of text / paragraph from another source or from post-entry post you a long time. "Blockquote" is also used to indicate a quote or words to be emphasized to visitors of a blog.

Here's how:

1) Sign in blogger account

2) Dashboard> Design> Edit HTML

3) By using ctrl + F (press simultaneously on the keyboard), find this code

/* Headings

4) Then, copy and paste this code POST / UNDER code / * Headings 

.post blockquote {
background:#FFCCCC;
padding: 5px;
Border: 2px solid #FF0099;
moz-border-radius: 10px 10px / 10px 10px;
border-radius: 10px 10px / 10px 10px;
colour:#FF0099;
}

You can adjust the values in the above code
FFCCCC - background color blockquote box. Refer Warri code below
2 - the thickness of the border line
solid - line border style. Whether dashed, solid or dotted
FF0099 - color border lines. Refer to the color code below
Purple color code - a box border.

5) When you're finished adjust the values of the above, click preview and if there is no error, click save template.

 Please read more my others tutorial about blogger blog and widgets.

Thank you for read...happy blogging......

Total Comments On Post Title


"Decorate your blog with tutorials provided. Please click on a category tutorials on your right side to see more tutorials. Most widgets tutorial are compatible with the basic template that has been provided by blogger.com. Some widgets, maybe not for a specific templates that are provided by other personal bloggers. But you can try it first. If it did not work, please remove this widget from your blog. Good luck."


Total Comments On Post Title


Follow the tutorial below:


1) Sign in blogger account

2) Dashboard> Design> Edit HTML> Tick the box "Expand Widget Templates"

3) By using ctrl + F (press simultaneously on the keyboard), find the code


<h3 class='post-title entry-title'>


4) Then, copy and paste the code below BEFORE / ABOVE code <h3 class = "post-title entry-title"> .

<b:if cond='data:post.allowComments'>
<a class='comment-bubble' expr:href='data:post.addCommentUrl' expr:onclick='data:post.addCommentOnclick'><data:post.numComments/><br/><span style='font-size:10px'>Komen</span></a>
</b:if>

For example, such a code will be like this:


<b:if cond='data:post.allowComments'>
<a class='comment-bubble' expr:href='data:post.addCommentUrl' expr:onclick='data:post.addCommentOnclick'><data:post.numComments/><br/><span style='font-size:10px'>Komen</span></a>
</b:if>
<h3 class='post-title entry-title'>
<b:if cond='data:post.link'>

5) Then click preview and if no error click save template.

 Please read more my others tutorial about blogger blog and widgets.

Thank you for read...happy blogging......

How To Change Your Blog Blogger Template


Hello all, thank you to visit to my blog with my second article that " How To Change Your Blog Blogger Tempate ". For those who read my previous article " How To Make Your Own Blog With Blogspot " and want to change the template of your blog, i will share ways how to change and choose the style design of your blog template.

How To Make Your Own Blog With Blogspot


Hello all, thank you to visit my blog with my first article that " How To Make Your Own Blog With Blogspot ". So far, there are still many online users from around the world who still do not have their own blog. Perhaps the current internet users still find or do not know how to create or build their own blogs with them self.


I'm not someone who is a professional in the blog, i also newbe still like you in the world of blogs. But i know little about the blog and where appropriate choice that has been provided by any public blog free 
web developers. On 16 February 2011, there were over 156 million public blogs in existence. On 20 February 2014, there were around 172 million Tumblr and 75.8 million WordPress blogs in existence worldwide. According to critics and other bloggers, Blogger is the most popular blogging service used today. Blogger is the leading choice compared wordpress.

How To Adding Page Menu And Label Tab In Blogger Blog


Usually, we only always create post articles at our own blog. Sometimes there are some important articles specific blogger posts, until overlooked by others internet browsers that visit your blog, when you post significant downward or to the next page, when you post too many articles, that have been conveyed. Therefore, important articles specific post from you can not read or known by other internet browser have already stopped at your blog. Because too often pressing the next button, internet browsers that visit to the your page were going to leave from your blog, very detrimental. How to solve this problem?

How To Create a New Page Title at Pages Blog Blogger


Hello all, thank you to visit again to my blog with my next article that " How To Create a New Page at Pages Blog Blogger ". For those who read my previous article " How To Adding Page Menu And Label Tab In Blogger Blog ", this is the next way to add more your pages in your blog, which your significant content like " Home", " About Me ", " Special Offer ", " Contact Page ", " Policy " etc.. .

Please follow step by step.

1) Please " Login " to your blogger dashboard.


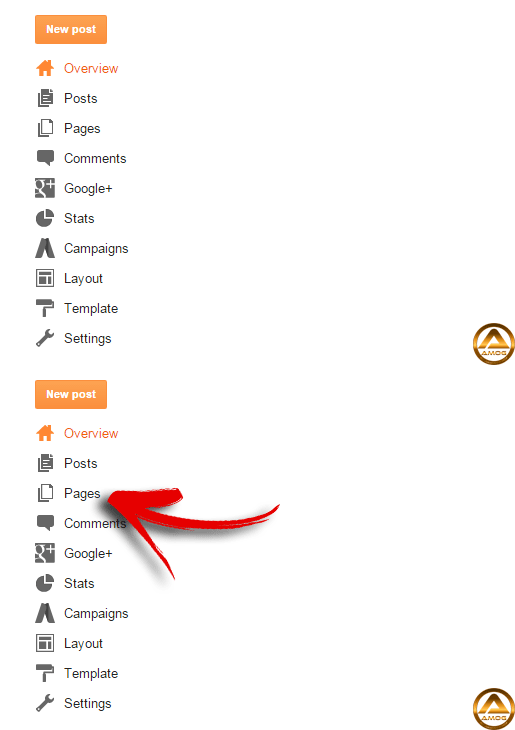
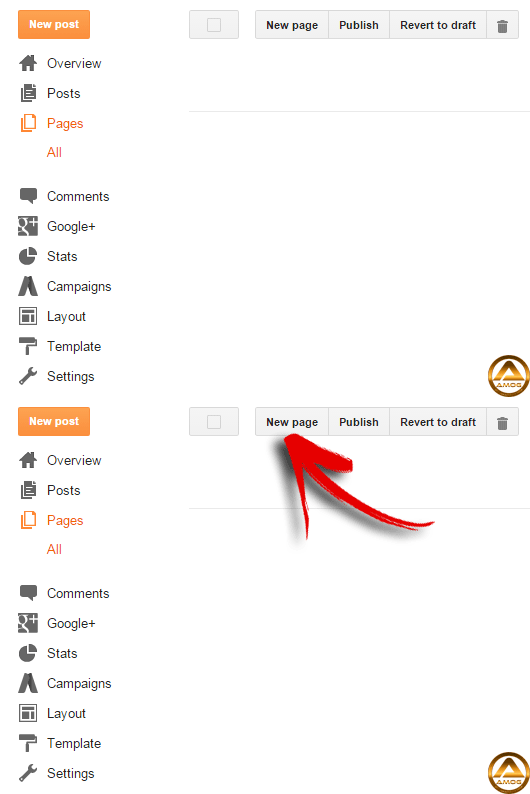
2) Click on " Pages "

3) Click on " New page ".

4)  Type the title and write a pages content.

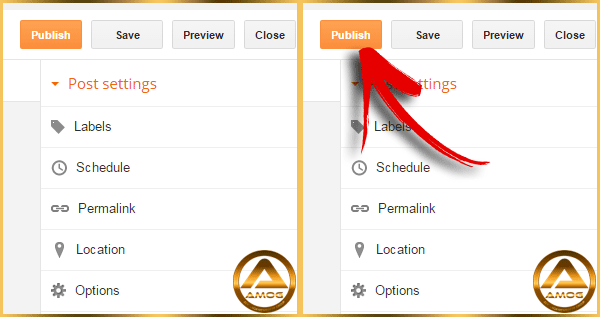
5) After your finish your content, click " Publish ".

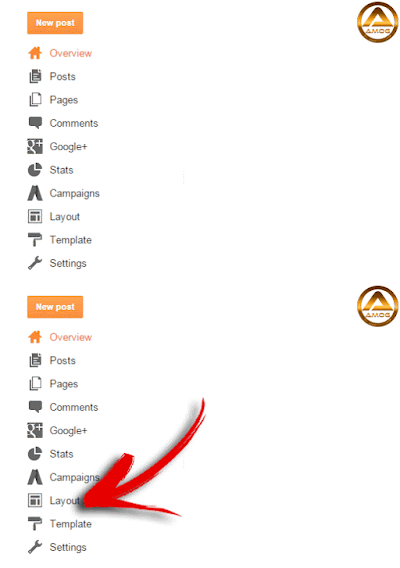
6) Then click on " Layout "


7) Go to " page " column " and click " Edit ".

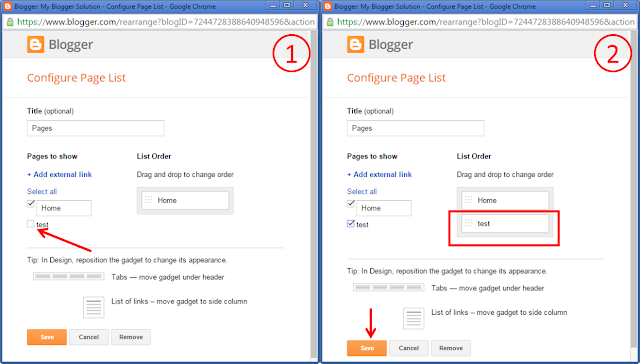
8) Configure Page List.
    1- Tick your new page title at " Pages to show "
    2- Your new page title now in " List Order ". If you have more than 2 page title, fill free         to " Drag and drop ". Then click " Save ".


Done!

Please read more my others article about blogger blog and tools.

Thank you for read...happy blogging......


Creating a Blogger Static Home Page by Don James


Seems like there's always an unusual case where you want to create a Blogger blog with a static home page instead of the reverse order blog posts instead. I see this question quite often in the forums and support pages of other sites. Though this isn't a typical configuration for Blogger, the recent changes in the new layout editor have made this easier than ever without having to spend time editing the template code as you had in the past.

How To Refresh Back Favicon for Blogger When Missing


Favicons are the small 16 pixel by 16 pixel pictures you see beside some URLs in your browser’s address bar is simply put a Icon or trademark that represents your blog or website. It is as you might be thinking a unique  logo that represents you and your brand all across the internet. 
Sometimes or after you upload your favicon, it does not display your favicon, still only favicon blogger or otherwise blank. For cases like this, you must reffresh back you favicon. If you want to refresh your favicon, type yoursite.blogger.com/favicon.ico in address bar, press enter and then a couple times press f5. After this, in your browser favicon will be refreshed.


Please read more my others article about blogger blog and tools.

Thank you for read...happy blogging......

How To Make Shake Link Effect Nudging In Your Blog


"Decorate your blog with tutorials provided. Please click on a category tutorials on your right side to see more tutorials. Most widgets tutorial are compatible with the basic template that has been provided by blogger.com. Some widgets, maybe not for a specific templates that are provided by other personal bloggers. But you can try it first. If it did not work, please remove this widget from your blog. Good luck."

To show how your blog more interesting for every your link to be shake effect, try this code, insert to your blog.


1) Sign in blogger account

2) Dashboard >> Design >> Page Element >> Add A Gadget >> Html / Javascript

3) Copy and paste the code below in a HTML / Javascript :
<script src='http://ajax.googleapis.com/ajax/libs/jquery/1.3.2/jquery.min.js' type='text/javascript'></script><script type='text/javascript'> $(document).ready(function() { $('a').hover(function() { $(this).animate({ marginLeft: '10px' }, 400); }, function() { $(this).animate({ marginLeft: 0 }, 400); }); });</script>

400 - speed / pace nudging effect. You can adjust this value for the speed of effect, they are small in value, the rate of shaking.

4) Lastly, click save and see the results.

Good luck! :)


Please read more my others article about blogger blog and tools.

Thank you for read...happy blogging......

How To Make Top Commentator In Your Blog


"Decorate your blog with tutorials provided. Please click on a category tutorials on your right side to see more tutorials. Most widgets tutorial are compatible with the basic template that has been provided by blogger.com. Some widgets, maybe not for a specific templates that are provided by other personal bloggers. But you can try it first. If it did not work, please remove this widget from your blog. Good luck."

This widget will display a list of the most Commenters on the blog. Follow the tutorial below to apply it on a blog.


Here's how:

1) Sign in blogger account

2) Dashboard> Design> Page Elements> Add a Gadget> HTML / Javascript

3) Copy and paste the code below in a HTML / Javascript
<!-- Top Commentators Cloud Start
(c) 2010 Blogger Sentral. Original code by http://www.bloggersentral.com/. Please do not remove this credit and the &#8220;Get this commentators widget&#8221; link at the bottom of the code.-->
<div style="text-align:justify;line-height:1.2;">
<script type="text/javascript">
function cCloud(feed) {
max = 0;
min = 10000;
//finding highest and lowest count
for (i=0;i<feed.count;i++)
{
ccCount = feed.value.items[i].commentcount * 1;
if (ccCount > max)
{
max = ccCount;
}
if (ccCount < min)
{
min = ccCount;
}
}
ccCountD = "";
display = "";
for (j=0;j<feed.count;j++)
{
ccdiff = feed.value.items[j].commentcount - min;
ccFontsize = 80 + (ccdiff * 100) / (max - min) + "%";
ccUrl = "'" + feed.value.items[j].authorurl + "'";
ccCountD = "(" + feed.value.items[j].commentcount + ")";//comment count
ccName = feed.value.items[j].title + ccCountD;
ccLName = "<a style='font-size:" + ccFontsize + "' href=" + ccUrl + " target='_blank'>" + ccName + "</a>";//clickable commentator name
display = display + ccLName + " ";
}
document.write(display);
}
</script>
<script src="http://pipes.yahoo.com/pipes/pipe.run?
YourBlogUrl=http://my-bloggersolution.blogspot.com/
&Exclusions=My Blogger Solution
&ShowHowMany=10
&Order=frequency
&_callback=cCloud
&_id=cfa196644e1d6159c9183548c4b5e2f5
&_render=json"
type="text/javascript"></script>
</div>

<!-- Top Commentators Cloud End -->

In the words of the blue - Put the blog name and url of your blog

4) Dah finished, click save and see the results.


Please read more my others article about blogger blog and tools.

Thank you for read...happy blogging......


Free Download | Blogger Minisite Template


Get now blogger blog minisite template for free. More blogger blog minisite template is coming soon. Free download now!!!


Support : Amog Blogger | 100% Free Minisite Template | Make Money On Your Blog
Copyright © 2015-2016. AMOG - All Rights Reserved
This template create by Maskolis
Maskolis.com | MasTemplate.com